I’ve long avoided ordering pork chops at restaurants.
Every time, I thought I was getting a juicy, tender cut of meat, but what landed on the plate was usually closer to tyre rubber with a thick, greasy fat cap. Somewhere along the line, pork chops got a bad reputation and I think it’s because so many places overcomplicate something that should be so simple.
The truth is, a great pork chop isn’t about the fancy ten-step marinades. It’s about understanding the simple chemistry behind temperature and “doneness”. Once you get that right, you’ll never eat another dry pork chop again.
Keep reading if you hate chewy, dry and overcooked pork.
Ingredients
For the brine:
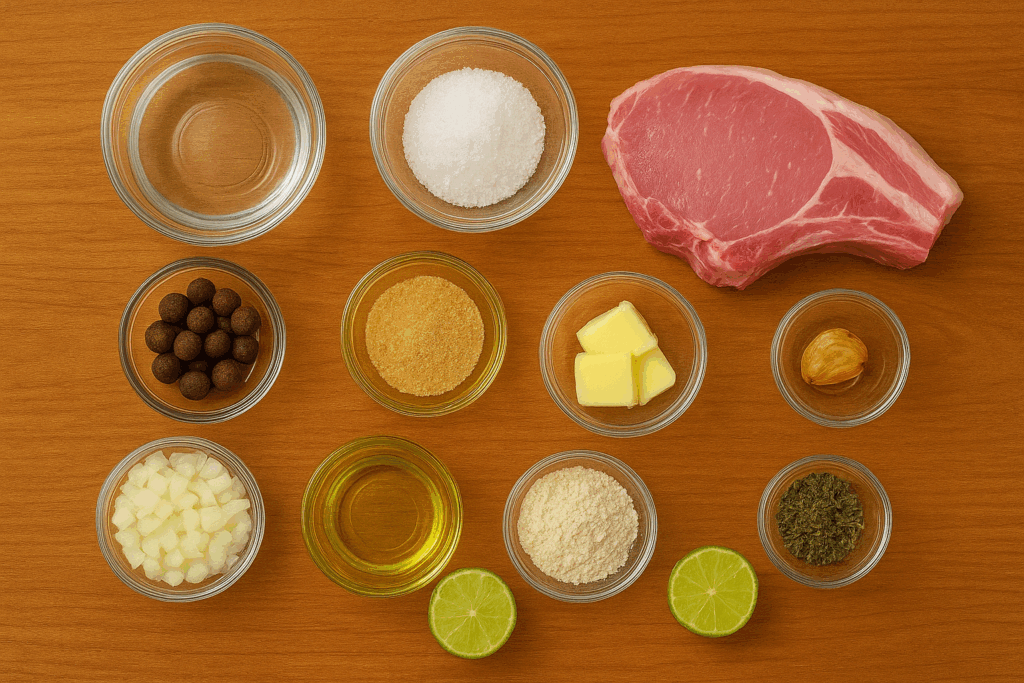
- 2 cups of water
- ¼ cup salt
- ¼ cup sugar
- Spices of your choice (star anise, cardamom, cinnamon, bay leaf)
For the pork chop:
- 1 and ½ inch thick pork chops (you can choose bone in or out)
- Seasonings of your choice (I used salt, pepper and cajun)
- Olive oil
- 3 cubes unsalted butter
- 1 crushed garlic clove (optional)
For the pan sauce:
- ¼ cup finely sliced onions
- 1 tsp flour
- 1 cup chicken stock (or ½ cup white wine and ½ cup chicken stock)
- ½ of a lime
- 1 tbsp rosemary (grinded)
- 1 tbsp thyme (grinded)
- ½ stick of butter (cut into cubes/thin slices)
Preparation of the chop
The secret to an unforgettable pork chop actually starts the night before, with a simple brine. In a large bowl, whisk together 2 cups of water, ¼ cup of salt and ¼ cup of sugar until dissolved. This is your base, but don’t be afraid to get creative. Toss in a bay leaf, a few star anise pods or a stick of cinnamon for a touch of aroma and warmth.
Submerge your pork chops (bone-in or boneless) in the brine, cover the bowl with plastic wrap and let them rest in the fridge overnight.
We tend to brine pork chops because the salt gently breaks down some of the muscle proteins, allowing the meat to absorb and retain more moisture (ie: juice) and it also tenderises the meat. If you’re a beginner and it’s your first time making pork chops, I would highly recommend this step.
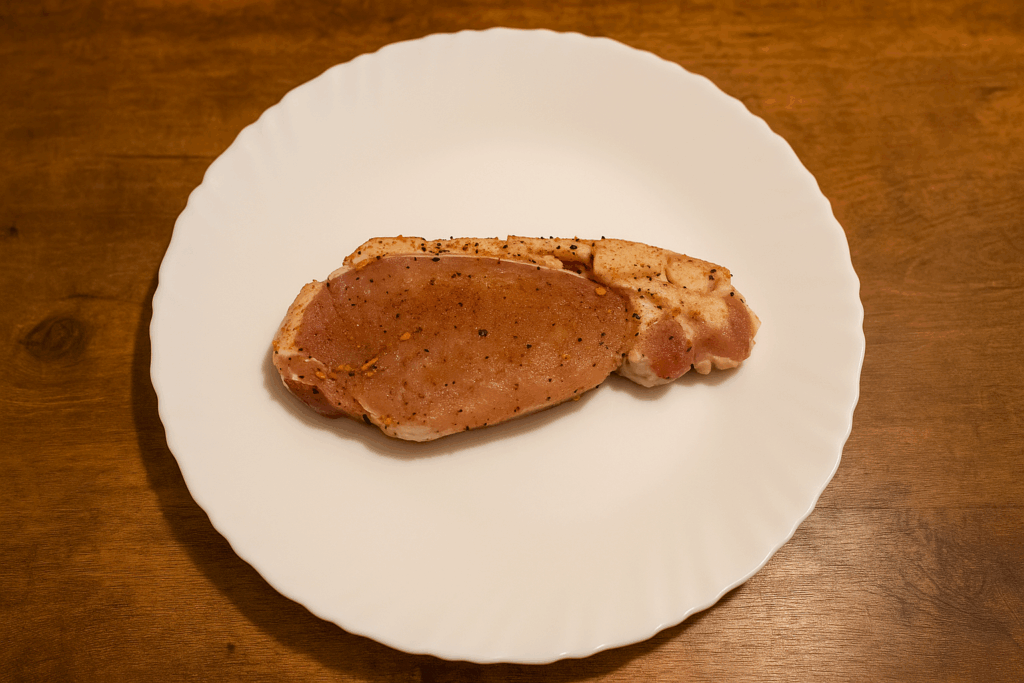
10 minutes before you want to start cooking, take the pork chops out and pat dry with a paper towel. This is really important because any moisture on the surface of the pork can prevent you from developing a nice, golden-brown crust.
Whenever you cook pork chops, always remember to KYSS (Keep Your Seasonings Simple) so that you don’t overpower the natural richness of the meat.
Cooking the pork
Before you start cooking, grab a pair of tongs. They’re essential for holding the meat while searing the edges of your chop (a spatula just won’t cut it).
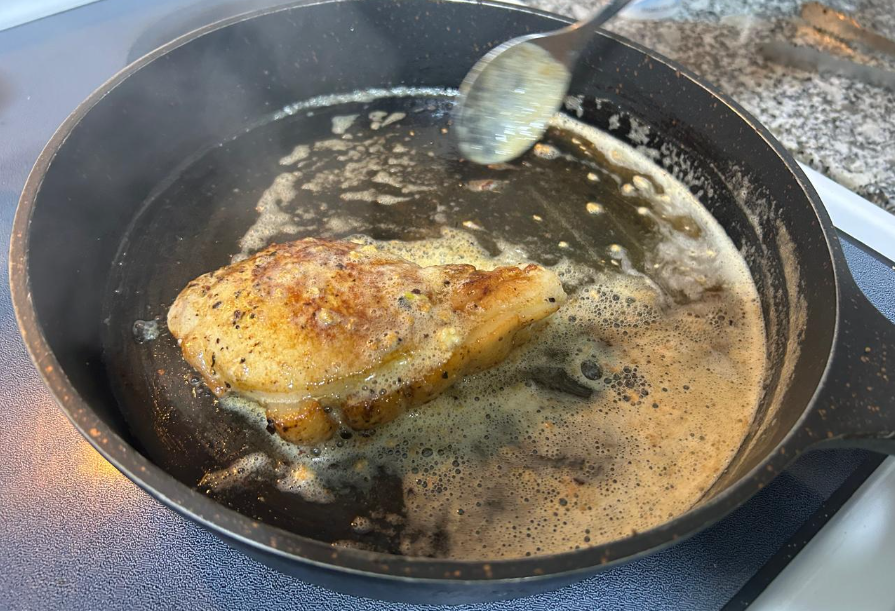
Heat a pan over medium-high with a drizzle of olive oil. Start by rendering the fat cap for about 2 minutes. You’ll see the fat begin to melt and pool in the pan and that’s exactly what you want. This rendered fat will help flavour and sear the rest of the chop beautifully.
Next, sear one side for about 4 minutes, letting it form a deep golden crust. Flip and sear the other side for about 1 minute to brown it evenly. At this point, your pork is mostly cooked through and ready for its finishing touch.
Drop the heat to low and add 3 cubes of butter and a crushed garlic clove. Tilt the pan and baste the chop continuously with the melted butter for about 2 minutes. This step layers on rich flavour and gives the surface that glossy, irresistible finish.
Once done, transfer the pork chop to a plate and cover it loosely with another plate or a lid. Don’t forget to pour all the butter and fat all over it! Let it rest for 5–10 minutes minimum – this allows the juices to redistribute, giving you a perfectly tender, succulent chop when you cut in.
I’ve created a table that will hopefully help you cook your pork to the preferred doneness. I would highly recommend using a meat thermometer. I’m planning on buying one very soon.
| Doneness | Temp (℃) | Texture | Juiciness | Science | Notes |
| Medium-Rare | 57-60 | Very tender | Extremely | Muscle fibers just begin to contract – minimal moisture loss | Below USDA’s recommended safe temp |
| Medium | 63 | Firm but still tender | Juicy | Myosin protein fully denatures while actin hasn’t tightened – keeps juices in | Safe – best texture + flavour balance (MY CHOICE) |
| Medium-Well | 66-68 | Firmer | Less Juicy | Myosin and actin both denature – fibers contract more tightly | Tasty, but drier and more chewy |
| Well-Done | 71+ | Very firm | Not Juicy | Excess heat causes water to evaporate. Fat melts but meat fibers toughen significantly. | If you choose to eat your pork chops like this, what are you doing? |
Pan Sauce
While your pork chop rests, try making a quick pan sauce, it’s the easiest way to level-up your dish and turn it to restaurant quality. Using the same pan, add ¼ cup of finely diced onions and let them slowly caramelise. If you’d like a thicker sauce, stir in 1 teaspoon of flour and cook for a minute to get rid of the raw taste.
Pour in 1 cup of liquid (chicken stock, wine, or a mix of both) to deglaze the pan. Use a spatula to scrape up all the fond (those flavourful browned bits at the bottom of the pan) and incorporate it into the sauce.
Now, take my advice here:
PLEASE DO NOT USE CHEAP BOUILLON CUBES FROM THE STORE!!!
I tried them today and they turned a rancid, grotesque green colour. I immediately disposed of it and tried to make my own using actual bones.
Let the sauce reduce and thicken. If you’re using wine, it’s ready once the sharp alcohol aroma fades. Add herbs and spices to taste, then finish with a few cold cubes of butter on low heat, stirring to emulsify until glossy. A squeeze of fresh lime juice right before serving adds a touch of acidity, which really ties everything together.
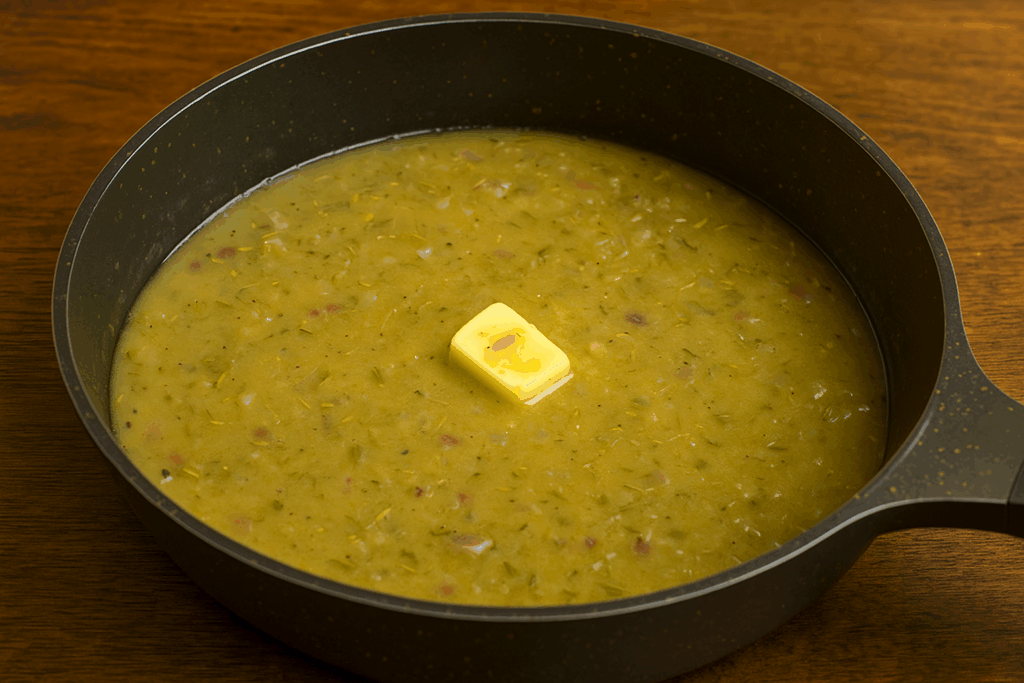
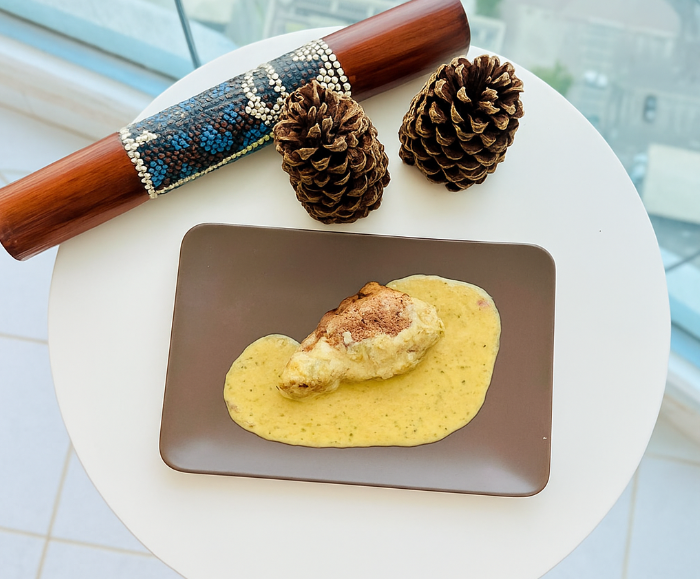
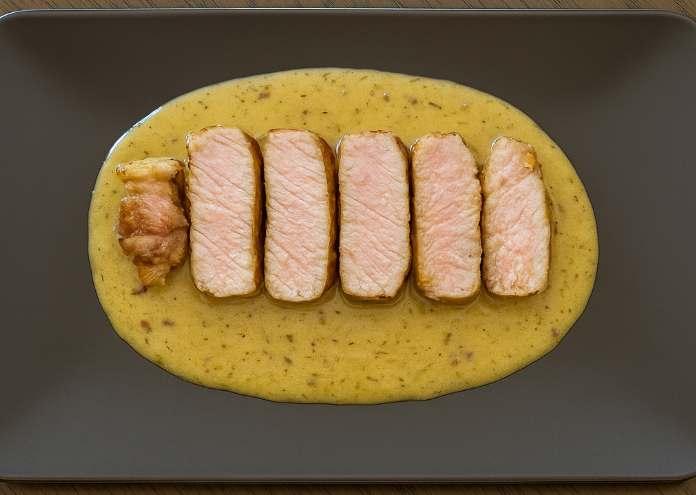
Spoon the sauce over your pork chop and enjoy the magic you just made in one pan.
Plating
I tried plating my pork two different ways, feel free to try either. All that’s important is that you drench your pork in that beautiful sauce, and enjoy each bite. The succulent fat cap will melt gradually in your mouth, and the tangy, flavourful sauce complements the rich pork in every way possible.
Hopefully now, you will never have to eat a rubbery piece of pork every again.
Do you have any recommendations for which meat thermometer I should use? Let me know in the comments.
This recipe is so meticulous and very helpful. Will definitely give it a try.