Yesterday, my kitchen smelled like summer.
There’s something about the tangy-sweet aroma of freshly squeezed key limes and a buttery biscuit crust that instantly lifts your mood. I hadn’t planned on baking a pie, but when I spotted those tiny, stubborn green gems at the market, I knew exactly what they were meant for. What followed was a simple and unexpectedly therapeutic afternoon of zesting, juicing, whisking and finally, savoring a slice of sunshine. Here’s how you can make the world’s best key lime pie.
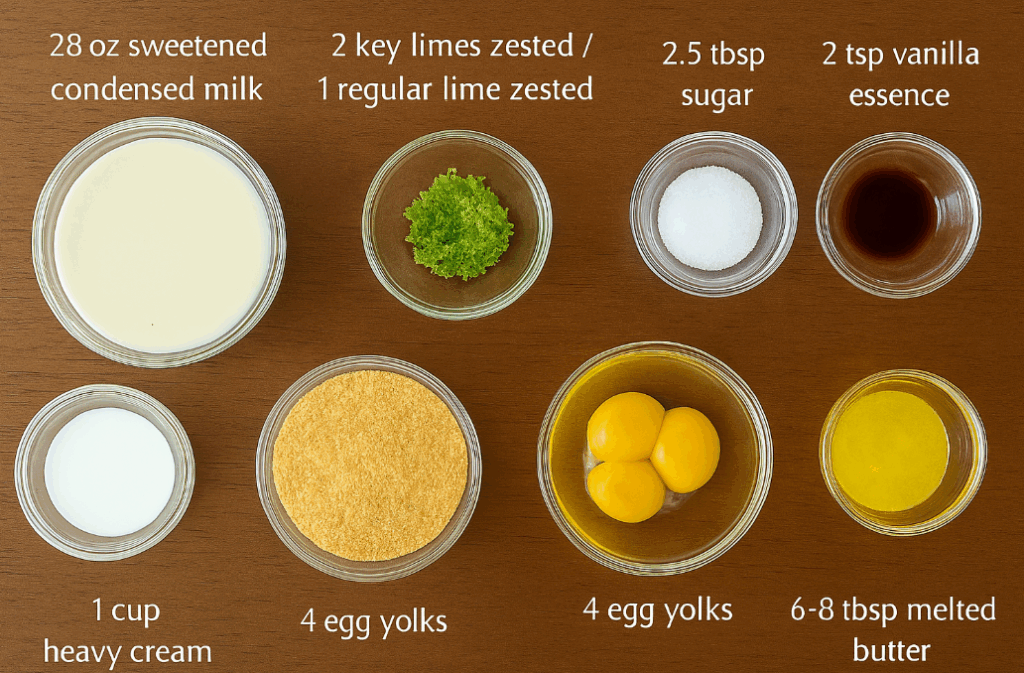
Ingredients
For the crust:
- 1 cup biscuit crumbs
- 6-8 tbsp melted butter
For the filling:
- 28 oz sweetened condensed milk
- 2 key limes zested / 1 regular lime zested
- ¾ cup key lime juice
- 4 egg yolks
For the toppings:
- 1 cup heavy cream
- 2.5 tbsp sugar (granulated OR powdered)
- 2 tsp vanilla essence
Crust
One of the most important elements of a great pie is the crust. It should be golden-brown, buttery and sturdy, not dry or crumbly. For this dessert, start with the crumbs from your favourite biscuit. Graham crackers are the classic choice, but I used Digestives this time – and honestly, both work great.
Next, stir in the melted butter, just enough to give the crumbs the texture of wet sand. Pour the mixture into an oven-proof dish, making sure it evenly covers the bottom and sides. Use the base of a glass or mug to firmly press the crust into place – this helps it stay compact and prevents it from falling apart later. Trust me, this step makes all the difference.
Slide the finished crust into a preheated oven at 350℉ (177℃) and let it bake for about 10 minutes. As it crisps and turns a warm golden brown, your kitchen will slowly fill with the rich, toasty aroma of melted butter mingling with sweet, nutty biscuit crumbs.

Filling
Thanks to a bit of culinary chemistry, the filling comes together in under five minutes. In a large mixing bowl, whisk together the egg yolks first, then add the lime zest and juice, followed by the sweetened condensed milk. As you begin to stir with a hand whisk, you’ll notice the mixture transform. What starts as a gloopy, unappetising blend quickly thickens into a smooth, glossy custard. It’s like watching dessert science in action, and the result is as satisfying as it is delicious.
But how does this actually work? When you mix sweetened condensed milk with lime juice, a process called acid-induced protein coagulation takes place. The milk contains casein proteins which react with the citric acid from the lime juice, causing them to denature and bind together. As a result, the mixture rapidly thickens without using heat.
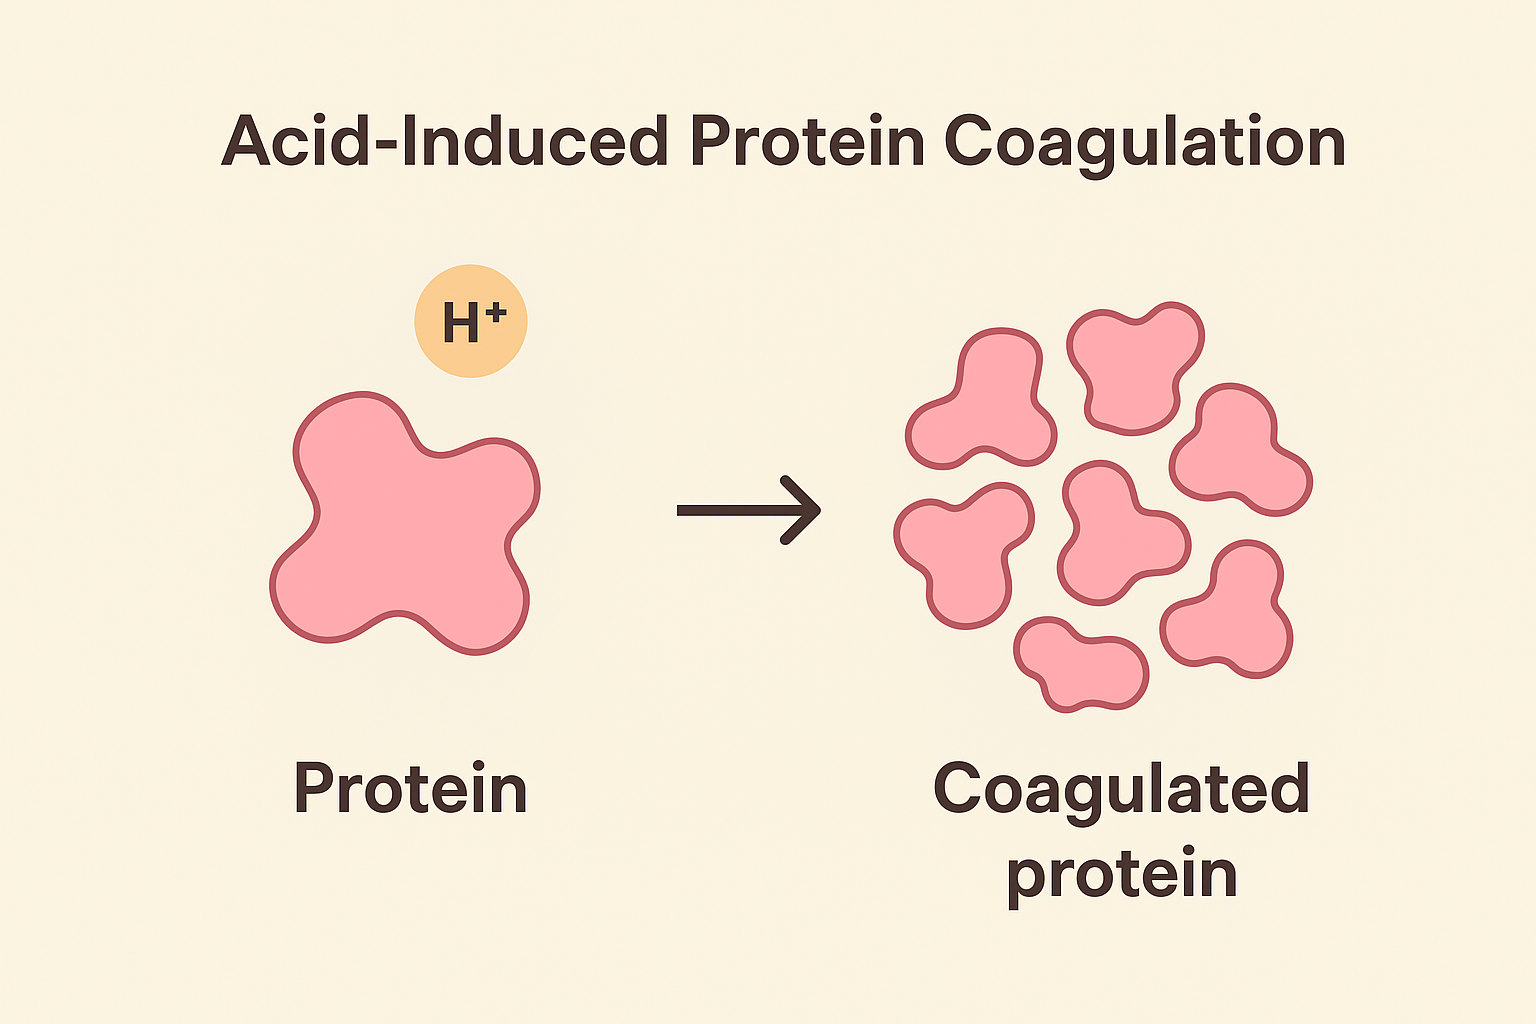
Beyond texture, this reaction also plays a key role in flavour. The acidity of the lime juice cuts through the richness of the condensed milk, balancing its sweetness and giving key lime pie that signature sweet-tart taste.
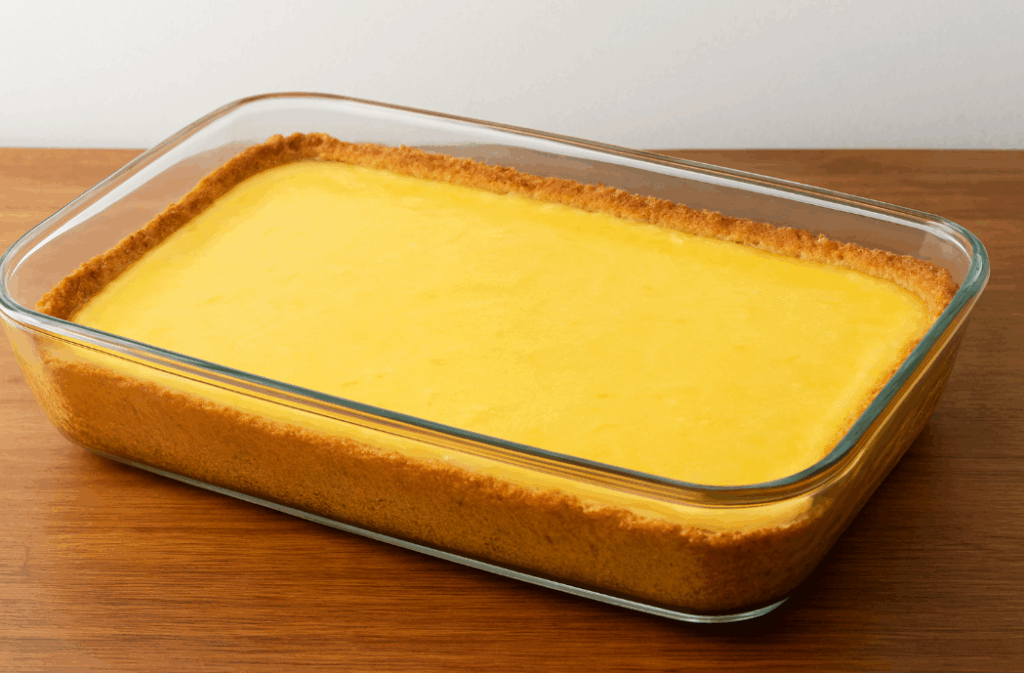
I know that it’s tempting to just eat that custard as it is, but believe me I can make it taste better. Pour the custard into your still-warm pie crust. Then, back into the oven at 375℉ for 10 minutes.
After it’s finished in the oven, you should notice a glossy texture on the top and it should glisten in the light. To check if it’s done, gently press a fork to the surface of the filling – it should be extremely thick. This means you’re ready for the final step. Put your pie into the fridge for 1 hour and wait. I promise you – this is the hardest step in the whole process!
Toppings
To balance the rich, tangy filling, you’ll want a topping that’s light, airy and just sweet enough. A simple homemade whipped cream does the trick beautifully. Using a hand mixer, whip together heavy cream, the vanilla, and a bit of sugar until soft peaks form – then keep going until they hold their shape in firm, fluffy swirls.
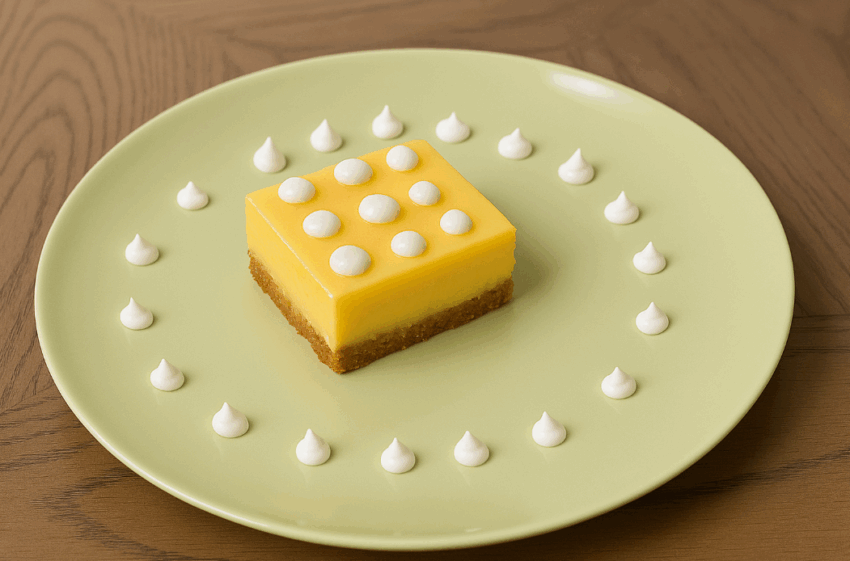
When it comes to decorating, the choice is entirely yours. I used a squeezy sauce bottle to dot delicate little pearls across the top, but honestly, you can also just spoon it on generously and call it rustic – it’s all delicious either way.
Results
And just like that, you’ve got yourself a slice of sunshine – the best key lime pie you’ve ever tasted. Cut yourself a perfect wedge, admire that golden crust and silky filling and take your time savouring each bite: the buttery crunch, the tangy-sweet custard, the cool cloud of whipped cream on top. My favourite dessert ever.

Pour yourself a tall glass of lemonade, put your feet up, and let the flavours transport you straight to summer. You’ve earned it.